Difference between revisions of "HELiX"
(→May 20 - May 24, 2019) |
(→June 3 - June 7, 2019) |
||
| Line 123: | Line 123: | ||
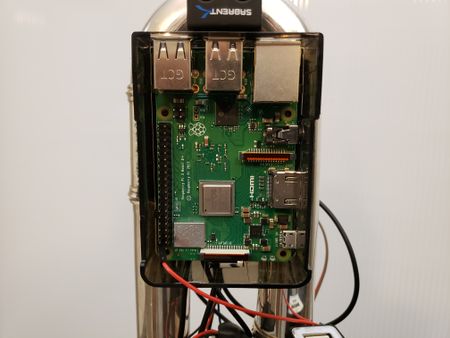
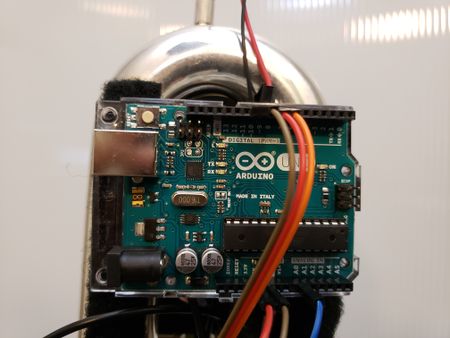
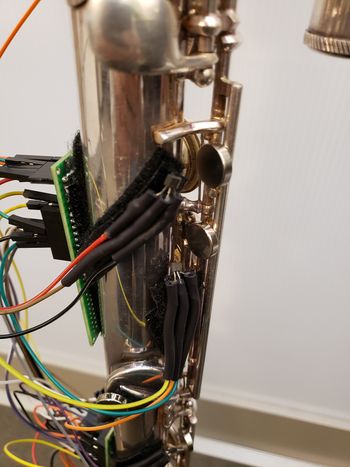
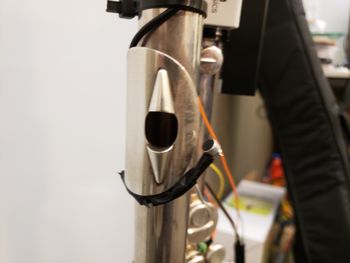
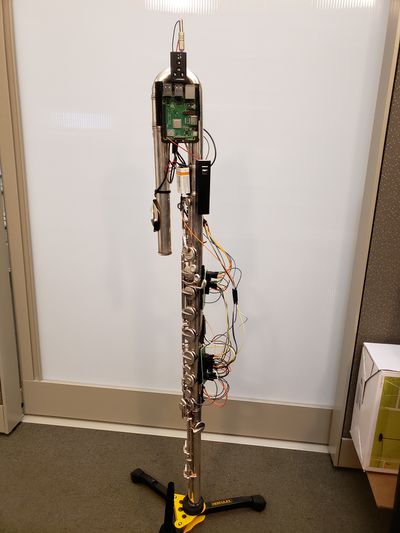
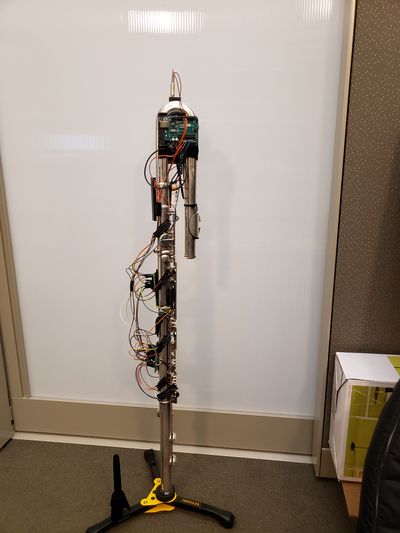
Below is the full implementation of HELiX v0.1 (Prototype). Development of this design will continue in future quarters! | Below is the full implementation of HELiX v0.1 (Prototype). Development of this design will continue in future quarters! | ||
| − | [[File:front.jpg| | + | [[File:front.jpg|400px]] [[File:back.jpg|400px]] |
==June 10 - Final Presentation!!!== | ==June 10 - Final Presentation!!!== | ||
Revision as of 17:39, 11 June 2019
Contents
April 1 - April 5, 2019
For this course MUSIC 220c I propose to design and implement an Augmented Flute that can act as a controller for a variety of music making and performance applications.
Motivation
Sensory Percussion by Sun House
In October of 2016 I attended the SF Music Tech Submit, discovering many new innovations and designs in the music tech industry. However, Sensory Percussion by Sun House stood out the most to me. The idea was to have the ability to play and trigger electronic sounds and samples through the acoustic drum itself. No external drum pad was needed. This allowed drummers to explore electronic music production without having to go through the learning process of a whole new system or apparatus. They could intuitively and easily create electronic tracks and pieces based on their language and knowledge of playing the drums. An example of how the system works can be found here:
https://www.youtube.com/watch?v=xNASyYWshQc
After hearing a live demo of this system all I could think of was that I wanted one, but for my flute. So for this course I plan to design and build an augmented flute that will allow me to easily and intuitively create electronic music through my existing knowledge and facility of playing the flute.
April 8 - April 12, 2019
Requirements
This week I began laying out the requirements for HELiX:
1) Needs to respond to the keys being pressed on the flute in order to determine what note is being played. From there, different electronic samples or parameters can be mapped to it.
2) Need to be responsive to various articulations of the user (i.e. single, double and triple tonguing).
3) Needs to be wireless, with more than 80% of sensor and DSP processing being done on the micro-controllers connect to the flute.
4) Needs to be abled to be networked to different devices on a particular network or across the internet. This would allow a proof of concept that this system could eventually work in a large Internet of Things (IoT) system.
5) Needs to be self powered and rechargeable.
Articulation Studies
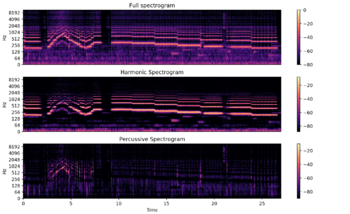
I started out by conducting several articulation studies of single and triple tonguing articulations. I recorded small snippets of my self playing concert flute and alto flute utilizing these articulations. The librosa library in python (https://librosa.github.io/librosa/) was used to perform the Harmonic and Percussive Source Separation (HPSS) on these recording. Below are examples of the resulting articulation spectrograms on concert flute:
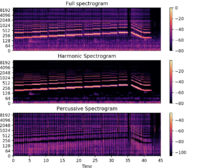
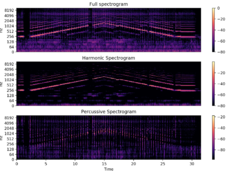
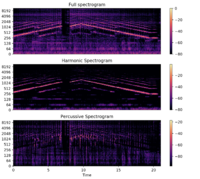
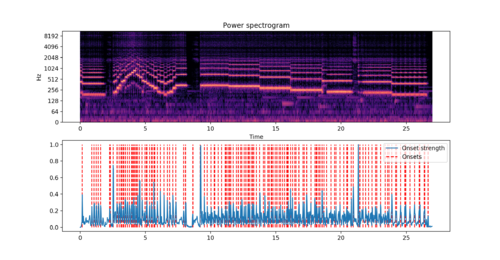
Here are some examples of the alto-flute articulation spectrograms and how they relate to onset detection graphs in librosa:
Generally, it can be observed that there are some complication when trying to detect a triple tonguing articulation as it is going by to fast for the system to recognize. In addition, through comparing the spectrograms to the onset detection graphs it was also found that vibrato was mis-interpreted as an onset articulation.
April 15 - April 19, 2019
This week I began to explore and work with various micro-controllers and sensors. These include:
Boards
1) Bela Board https://bela.io/
2) Arduino https://www.arduino.cc/
3) Rasberry Pi https://www.raspberrypi.org/
The one of most interest is the Bela Board due to its advertised low latency speed of 1ms of playback audio. The Bela board includes an audio cape that lies on top of the Beaglebone Black board. The audio cape was found in the MAX lab and I have started to experiment with it. If the Bela board does not work I plan to use a combination of the Arduino and Rasberry pi for the handling of sensor and DSP processing.
Sensors
1) Force Sensors 2) Buttons
In order to detect what keys are being presssed on the flute I plan on using force sensors on top of the keys. When pressed the force sensors should provide a specific value that would signal that the key has been pressed. I have begun to experiment with these sensors. If the force sensors do not work the back up plan is to use push buttons sensors instead.
April 22 - April 26, 2019
Update
Continued to experiment with the Bela Board. I was able to run the example code through the browser IDE. A good amount of time was used this week researching how to connect the Beaglebone to the audio cape after the SD card was flashed with the correct Bela image. Apparently, the reset button has to be pressed down on the Beaglebone black at start up so that it can use the Bela image on the SD card. The Audio cape must be off the Beaglebone Black during this process. After the Bela image has been booted to the Beaglebone Black the audio cape can then be attached to the Beaglebone black.
April 29 - May 3, 2019
Update
Built and soldered components to build an air microphone from the MUSIC 220a website:
https://ccrma.stanford.edu/courses/220a/resources/MicBuilding.pdf
I was able to connect the microphone to the Bela Board and see the audio data going through the board in real-time on the on board oscilloscope. In addition, I experimented with FFT examples in Pure Data (Pd) that would eventually be uploaded to the board. However, due to the time constraints and the learning curve associated with the Bela board, I will be be using the Arduino and Rasberry pi combination moving forward.
May 6 - May 10, 2019
Update
I installed all python dependencies for this project: Numpy, Scipy, librosa, and pyaudio. Also was able to install Wekinator on the Rasberry pi (WekiMini and WekiInputHelper). Was able to successfully implement the HPSS algorithm in realtime using the pyaudio and librosa libraries. I was able to separate the harmonic and percussive elements of the signal by:
1) Taking the STFT of each incoming buffer
2) Perform HPSS, librosa.decompose.hpss() function
3) Take the ISTFT of both the harmonic and percussive elements
I was then able to add each element in the percussive and harmonic arrays in one OSC messge (i.e. (/HELiX percussive_value, Harmonic_Value)). Each OSC message was then sent to WekiInputHelper which was then successfully input to WekiMini.
Audio was taken from an external microphone and external sound card and sent into the Rasberry pi vis USB. In addition, force sensing resistors (FSR) were also experimented with. I tested them directly on the flute keys them selves. The resulting values were not consistent or reliable when determining if a key was pressed or not. As a result, I attempted to place the FSRs under the hammers connected to the springs of the flute (I like to call it the spine of the flute) which provided more consistent readings. The next step is solder longer wires to the FSR in order to get to the Arduino Micro-Controller. I attempted to used the GPIO pins on the Rasberry pi for the sensor data and then realized that the Rasberry pi only handles digital values. I attempted to use an ADC converter (MCP3008) between the FSR sensors and pi. Still had no luck getting meaningful values into the pi. For the sake of time I attached the sensors to and Arduino Uno and feed the analog data to the pi using the the serial port. I was successfully able to connect the Arduino with the Rasberry pi.
May 13 - May 17, 2019
Update
The FSR began to break and degrade at a fast rate when attaching them on to the flute. Also the amount of solder needed to secure the wiring between the FSR and the Arduino required more heat than the FSR could handle so the plastic on many of the FSR melted or weakened the sensor itself. As a result, push buttons were used on top of the keys instead. However, this solution was very inconvenient for the player or user. So either the system will need to only need to use raw audio data or a different sensor will need to be used. As suggested in class Hall Effect sensors may be a potential option.
May 20 - May 24, 2019
Update
The hall effect sensors work! It appears that the spine of the flute is magnetic so I attached 7 small magnets, one for each key so when moved the small motion can be picked up by the hall effect sensors. However there are 5 analog input pins on the Arduino and at least 7 sensors are needed to accurately and easily detect what keys are being pressed. As a result I used a multiplexer (74HC4051) to multiplex the signals coming from all seven sensors to analog pin 0 on the Arduino. This is shown in the second image below. Several averaging and smoothing algorithms have been experimented with to determine what classifies as "Press" vs "Not Pressed" Key. In addition, I also found a small USB sound card that I could plug the MUSIC 220a microphone that I built earlier into. As a result, I no longer need a larger external microphone and sounds card, it can all fit on the flute!
May 27 - May 31, 2019
Update
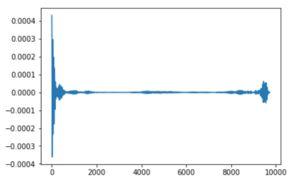
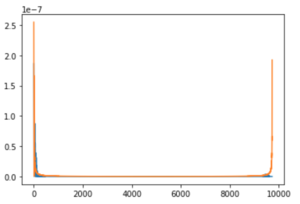
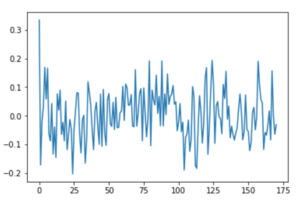
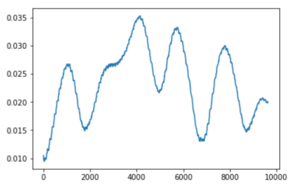
Further filtered and smoothed the percussive and harmonic parts on the output of the HPSS algorithm running on the Rasberry Pi.
Percussive Elements
Harmonic Elements
June 3 - June 7, 2019
Update
Below is the full implementation of HELiX v0.1 (Prototype). Development of this design will continue in future quarters!
